Well, today is supposed to be all about scrapping, but wanted to share our weekend with you first...
We had a blast this weekend. Got to see the shuttle lift off from our house. It was amazing, the entire sky lit up. Saturday we took it easy and basically just relaxed, and yesterday we went to the Bucs game. It was fantastic. Had seats on the 50 yard line, and it was just a great game. Matthew was really good too, which was a big plus. Today we are going to Monkey Joes, which is a big play place around here. First time going, so I'll let you know how it is...
For scrapping today (it's going to be short and sweet), I am going to talk about personal die cutters. I have quite a few of them, and I wouldn't part with any of them... I have (in list of smallest to biggest) a cuttle bug (which is a personal cutter/embosser, etc) and a quickutz. I used to have a sizzix and sidekick, but sold them at a garage sale when I got the cuttlebug, as it is an all in one cutter. I still have all of my quickutz, sizzix, sizzlits and cuttlebug dies though, as they are universal and can be used in the one cutter. From there, electronic cutters... I have a Cricut and Craftrobo. Why both? Because they both offer different things. Cricut is fantastic, you can buy shape and letter cartridges, but I focus mostly on shapes now, since having the craftrobo. I have the designstudio for cricut too, which makes it even more versatile. Craftrobo, is great. There is a learning curve, but well worth it when you get past it. I have 1800 fonts on my computer and can cut each and every one, along with any die cuts that I scan in, any clip art, etc. The list goes on and on. It's hard to pick a favorite between them, because they are all so different, but I truly love them all. Later today I hope to share (since I didn't last week) stuff made with my cutters.
Monday, November 17, 2008
Thursday, November 13, 2008
Baking...
Yuuummmyyy!!! I love baking, and try to take the opportunity to do so at least once a week. I want my kids to grow up with memories of homemade goodies in the house, with that wonderful smell lingering when the get off the bus... because it is just such a wonderful thing. This past week was an angel food cake, with strawberries and whipped cream. So yummy, and light too, which is always a plus.
Taylor calls us "the cookie factory" during the holidays because we make so many for neighbors and friends. Last year I made them for each of Aaron's managers too, so we handed out a tin of cookies to over 25 families. They all love it, and tell us how the look forward it it each year. Usually we do 13-15 types of cookies and some fudge or homemade candy in there too. It's usually a three day affair. Aaron's the dishwasher (whew!), and Taylor and I make the cookies. We've been doing it for years, since she's been about six. Something I will never forget and always will treasure the memories of.
A recipe to share for this week... I got this from an email, and they reminded me of the Ferrero Roche chocolates, which are my favorites...
They are from Nestle, and are called Toasted Almond Truffles... Rated Easy on the difficulty scale... These will definitely be in my Christmas tins this year!
Toasted Almond Truffles

Creamy and sinfully rich, these chocolate candies are coated with a fine layer of almonds. A touch of vanilla adds a warm note to this sweet confection. Estimated Times:Preparation - 20 min Cooking - 5 min Cooling Time - 1 hrs 30 min refrigerating Yields - 24 truffles (2 dozen)
Ingredients:
1/2 cup NESTLÉ® CARNATION® Evaporated Milk
1/4 cup granulated sugar
1 3/4 cups (11.5-oz. pkg.) NESTLÉ® TOLL HOUSE® Milk Chocolate Morsels
1/2 to 1 teaspoon almond or vanilla extract
1 cup sliced almonds, finely chopped, toasted
Directions:COMBINE evaporated milk and sugar in small, heavy-duty saucepan. Bring to a full rolling boil over medium-low heat, stirring constantly. Boil, stirring constantly, for 3 minutes. Remove from heat.STIR in morsels. Stir vigorously until mixture is smooth. Stir in almond extract. Refrigerate for 1 1/2 to 2 hours. Shape into 1-inch balls; roll in nuts. Cover; refrigerate until ready to serve.
Whoops, a few days behind already!
I think I got too detailed with my first blog post, that I will scale back a bit and take it from there. I am working on a new venture. I went to a local craft fair this weekend, and am going to start my own paper crafts business, and hope to sell at craft fairs and on ebay and etsy. My new website, which is a work in progress is www.papercreationsbynicole.com . I will post my regular post in a few minutes, but that's why I'm behind on it all. :) Enjoy and come check me out on my new website!
Sunday, November 9, 2008
Reflecting on Beginner's Scrapbooking
I've been scrapbooking for the past nine years, and love it. It's my creative outlet and a wonderful way to preserve our memories of past and present. My kids of course are my number one subjects, but I've also worked on a heritage album for my mom for her 75th birthday and a gift baby album for my sister. My next big project is my wedding album and growing up years. I am really excited to be tackling this.
If you want to start scrapbooking, where do you begin? What tools do you need? What are nice extras to have? We will cover these three topics this week and i will share some pages of mine that I've been working on recently.
Basic Supplies:
If you want to start scrapbooking, where do you begin? What tools do you need? What are nice extras to have? We will cover these three topics this week and i will share some pages of mine that I've been working on recently.
Basic Supplies:
- A paper trimmer is ideal (my favorite is Cutterpede), but if not, scissors or a craft knife and ruler can work too
- An Acid Free Album... Those magnetic albums from the 80s will destroy your photos. The acid eats away at the photos and will deteriorate them in a few years.
- Cardstock and patterned paper. It is nice to start with a coordinating package that has a variety of carstock and papers. If you want to start smaller and see if this hobby is for you, pick two to three colors of cardstock and one coordinating patterned paper
- Acid free glue/tape. I prefer tape runner, which you can find at craft stores. They are double sided and make your pages go much faster.
- Acid free pen for journaling about the event... telling your story
- Coordinating sticker, embellishments, etc
Some nice extras... paper trimmer is my number one extra, some ink for distressing the edges, ribbon, brads and eyelets, and paper punches... These are all embellishments and are no way necessary, but nice added extras.
Where to Begin?- First thing you need are photos. You don't want to start with something big like your wedding, because your taste will change and adapt over time. Pick a holiday or birthday, or some type of event that you are excited to do. You may have 30 pictures, you may have ten. Weed through those and pick out the best, usually between seven to ten pictures, unless you want to do more pages on that one event.
- From these photos you will have a starting point, or a basis to go on for your layout. What is the mood? Who is involved? What do you want to portray from these photos? This can give you a basis of two to three colors that you may want to start with. For example, my son's first birthday was Baby Einstein themed, so I am planning on primary colors for his layout with a nice geometric pattern. I would pick red, yellow and blue
- Take a look at your pictures and see what you can "crop" smaller. There may be a lot of wasted space on the photos, or background you don't need, so elminating that allows you to fit more on the page. To make your photos timeless, try not to cut in cutesy shapes such as stars or hearts... Squares and rectangles are ideal. Ideally you can have five full size photos and three smaller square photos on your layout without visual clutter.
- After your photos are trimmed, matte your photos that you want to stand out. Choose one to three based on how many you have on your layout, so you can identify what you want highlighted. By matting your photo, just give it a half or quarter inch border around all sides. So if the phot was 4x6, you would have a 4.5x6.5 matte that you can put the photo. For my son's layout, I may choose to matte the picture of him with the cake, one of us as a family and one with gifts.
- Arrange your photos on your page the way it makes sense to you. You want it to be visually stimulating, let it lead te eye across the page (which I will speak about more in the weeks ahead).
- Make sure you save room on your page for a title, journaling and embellishments. That's what makes it a scrapbook. That way when someone is looking at your page, all of the explanation is right there. A title can be as simple as the event, or a quote (take me out to the ballgame for a baseball game), just let your imagination be your guide. Titles can be made on your computer, be pre-made or with stickers, stamps and stencils.
- Journaling will give you a chance to express your feelings on that day. Take it beyond the who, what, where, when why and how, and talk about your feelings... How fast the first year went, and that you can't believe your son is already one... you get the picture
- Add some creative touches, some embellishments or stickers that relate to the event, maybe some wrapped presents or party streamers. Try to keep them in groups of three, as that is more visually appealing to the eye.
That's it! Most of all, have fun! Remember, it is a hobby and something that shouldn't feel overwhelming. You may have years of photos and not know where to begin... Start with what is most current and work backwards. Those events are fresh in your mind and what will be a wonderful starting point. Best of luck and let me know if you need any help!
I will be posting my pages later today when my little guy is napping. Happy Scrapping!
Blog Beginnings
I am going to break down techiques and reflections for certain days of the week, Monday through Friday, stay tuned for fun stuff in the weeks ahead! Here's the breakdown...
- Marvelous Monday: all about scrapbooking
- Terrific Tuesday: all about cooking
- Wonderous Wednesday: all about cards/other paper crafts
- Thrilling Thursday: all about baking
- Fabulous Friday: all about any other crafts
Blogging Take Two...
I started this in 2007 and life got overwhelming, I felt like all I was doing was whining on here, so I stopped... Here I am again, hoping that I can take this up again and turn it into more of a hobby. A little about me...I am a sahm of two wonderful children and wife to the best husband in the world. I love to scrapbook, cooking, cardmaking and doing all types of crafts. I've been scrapping for the past eight years and love it. It's my creative outlet and such a great way to preserve family memories. I am a tactile person and to be able to go into my scrap/craft room and play is such a great thing, although I've been dabbling in digital scrapping lately and love that too. Beyond that I love to read, going to theme parks and just spending time loving on my family. We live near Orlando so we do go to the parks a lot.
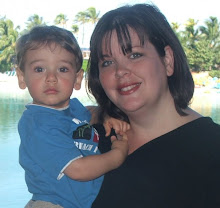
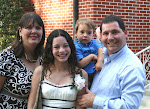
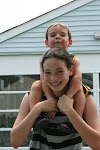
THE KIDS: Taylor is my 14 year old daughter. She's my stepdaughter but I couldn't love her more if she was biologically mine. I've been in her life since she was three, and couldn't imagine it without her. We share custody with her mom and live in the same town. We are one of those rare divorced families that get along great. It's what's best for the kids, and makes life a lot easier that way too. She is a freshman in high school and is very active in church, the school chorus and foreign language club.Matthew is my little joy, and is all boy. He is 28 months old, and I have to say, it is incredible watching this little being grow. He is just amazing. He gets into everything and is true to the term ALL BOY. I love it! We stay involved in playgroups, and go to My Gym and Kindermusik for mommy and me classes and go to the YMCA, which he gets time away from Mommy with other little ones while she works out. Matthew is our little miracle. We tried for four years to have a baby before seeing a specialist. Our first round of treatments we were pregnant. I was totally amazed! What a wonderful gift from God.
My wonderful husband... Aaron is the love of my life. I couldn't imagine what it would be like if I didn't meet him. He is my rock, my night in shining armor. We love spending time together and do everything we can to make our kids' lives wonderful. He works for an oil company as the regional manager for the past sixteen years. He is very good at his job, and even though at times it is tedious, he does great. He is very musically inclined, (which is where Taylor gets it from) and loves to play the guitar, write songs, record, play the harmonica and drums. He always puts us first and is such a fantastic father. I couldn't have asked for a better one.
I'm hoping to turn this into an informative blog about life as a stay at home mom, crafter and chef. I love sharing what I learn and learning from others, so I hope you enjoy this!
I started this in 2007 and life got overwhelming, I felt like all I was doing was whining on here, so I stopped... Here I am again, hoping that I can take this up again and turn it into more of a hobby. A little about me...I am a sahm of two wonderful children and wife to the best husband in the world. I love to scrapbook, cooking, cardmaking and doing all types of crafts. I've been scrapping for the past eight years and love it. It's my creative outlet and such a great way to preserve family memories. I am a tactile person and to be able to go into my scrap/craft room and play is such a great thing, although I've been dabbling in digital scrapping lately and love that too. Beyond that I love to read, going to theme parks and just spending time loving on my family. We live near Orlando so we do go to the parks a lot.
THE KIDS: Taylor is my 14 year old daughter. She's my stepdaughter but I couldn't love her more if she was biologically mine. I've been in her life since she was three, and couldn't imagine it without her. We share custody with her mom and live in the same town. We are one of those rare divorced families that get along great. It's what's best for the kids, and makes life a lot easier that way too. She is a freshman in high school and is very active in church, the school chorus and foreign language club.Matthew is my little joy, and is all boy. He is 28 months old, and I have to say, it is incredible watching this little being grow. He is just amazing. He gets into everything and is true to the term ALL BOY. I love it! We stay involved in playgroups, and go to My Gym and Kindermusik for mommy and me classes and go to the YMCA, which he gets time away from Mommy with other little ones while she works out. Matthew is our little miracle. We tried for four years to have a baby before seeing a specialist. Our first round of treatments we were pregnant. I was totally amazed! What a wonderful gift from God.
My wonderful husband... Aaron is the love of my life. I couldn't imagine what it would be like if I didn't meet him. He is my rock, my night in shining armor. We love spending time together and do everything we can to make our kids' lives wonderful. He works for an oil company as the regional manager for the past sixteen years. He is very good at his job, and even though at times it is tedious, he does great. He is very musically inclined, (which is where Taylor gets it from) and loves to play the guitar, write songs, record, play the harmonica and drums. He always puts us first and is such a fantastic father. I couldn't have asked for a better one.
I'm hoping to turn this into an informative blog about life as a stay at home mom, crafter and chef. I love sharing what I learn and learning from others, so I hope you enjoy this!
Subscribe to:
Posts (Atom)
